Enabling Cisco SE-Connect With the GUI
There are plenty of guides out there that explain how to put a Cisco AP in SE-Connect mode via SSH, but what about the GUI?
Pre-Requisites
For this guide, you’ll need to first convert your Cisco AP to autonomous mode. To convert my AP, I used an excellent guide by Rasika Nayanajith.
Guide
Log into the Cisco AP. If you haven’t changed the password, the username is
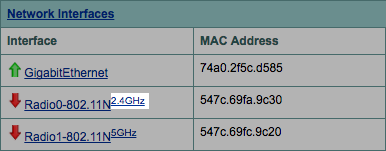
cisco, and the password isCisco.On the `Home page, click the 2.4 GHz link next to Radio0-802.11N.
- Click on the Settings tab.

- At Enable Radio, select Enable. At Role in Radio Network, select Spectrum, and click Apply at the bottom.
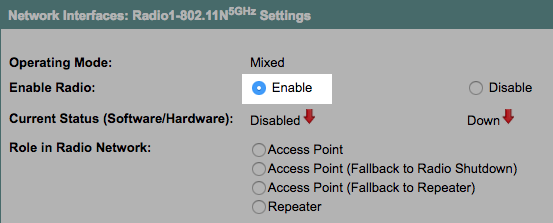
Go back to the Home screen, and do the same process for the 5 GHz radio (enabling it, setting the role to Spectrum, and applying the settings).
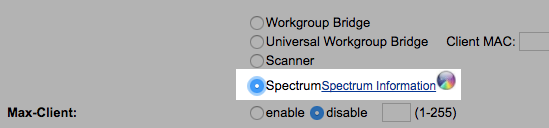
Click on the Spectrum Information link.
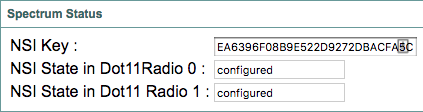
After a moment, the NSI Key field will populate.
That’s it! Now you can grab the NSI key and IP address, and take it to either Chanalyzer + Cisco CleanAir or Cisco Spectrum Expert to perform remote spectrum analysis.