Aliasing MAC Addresses with Wireshark

I love Wireshark, but one thing is for sure: tracking 802.11 conversations with my human brain is difficult. Coloring rules help, but I find it very difficult to remember which MAC address is which wireless station.
Fortunately, Wireshark has the ability to alias IP and MAC addresses! These are defined in the ethers file. You should be able to do nearly the same thing on Windows, but here’s how to do it on macOS.
Aliasing MAC Addresses
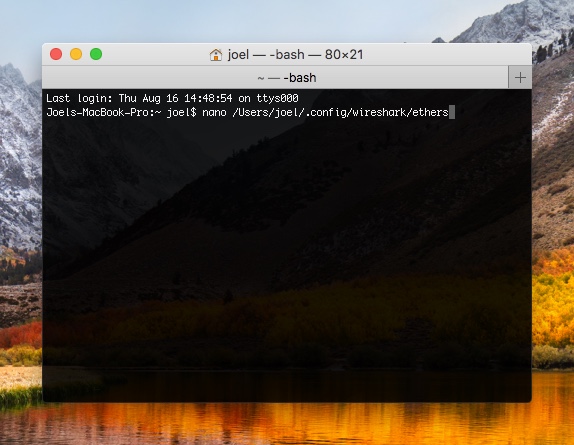
- Open a terminal, and run:
1
nano ~/Users/your_username/.config/wireshark/ethers
- Define the MAC address and the desired alias in the file. Separate the MAC and alias with any number of spaces. Aliases themselves can’t contain spaces.
1
2
3
ab:cd:ef:12:34:56 (AP)Aruba205H
12:34:56:ab:cd:ef (Client)Nokia6.1
ab:12:ef:cd:34:56 (Client)MacBookPro
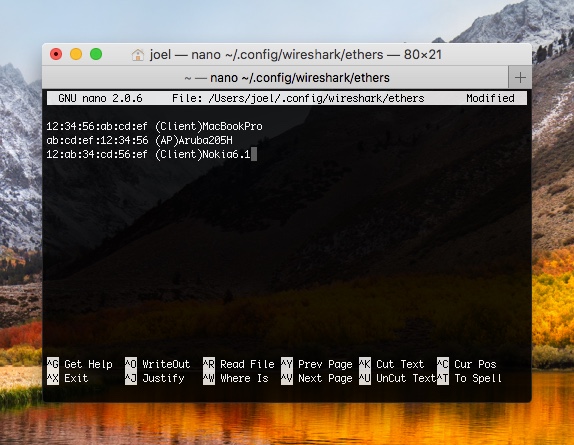
- Save the file by pressing
Ctrl+X, thenYfor yes, thenEnter. - Restart Wireshark, and now friendly, readable aliases will appear in place of MAC addresses.
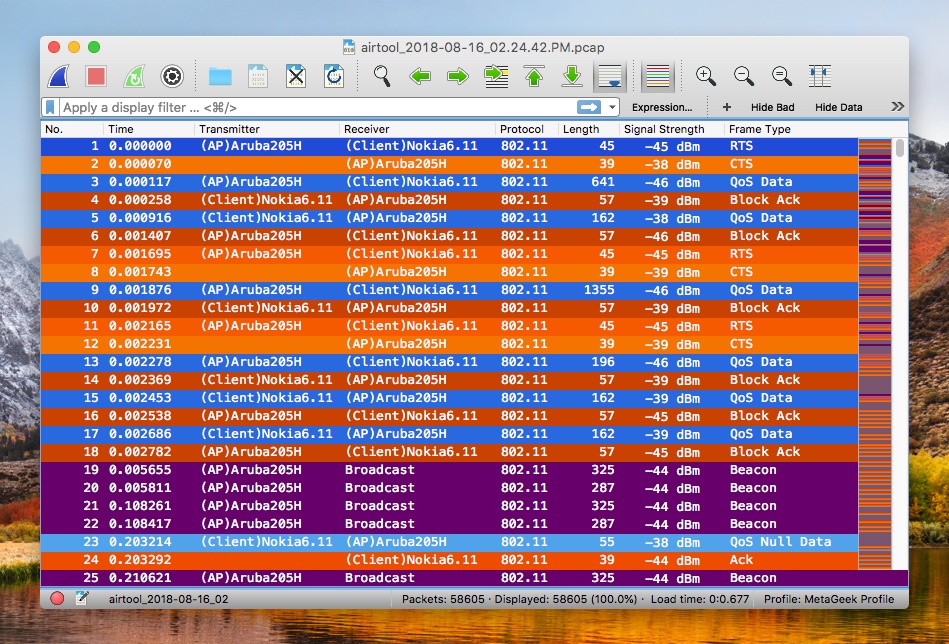
When defining names, I like to lead with either (AP) or (Client) so I can immediately tell which side is talking.
Appending the Ethers File
You can quickly add new MAC addresses to your file with cat.
When appending with cat, be very careful to use
>>. Using just one>will overwrite the entire file!
- In the terminal, run this line:
1
cat >> /Users/your_username/.config/wireshark/ethers
- Press
Enter, which will start a new line. Add any new hosts, line by line.1 2 3
ab:cd:ef:12:34:56 (AP)Aruba205H 12:34:56:ab:cd:ef (Client)Nokia6.1 ab:12:ef:cd:34:56 (Client)MacBookPro
- Press
Ctrl+Dto write the additions to the file.
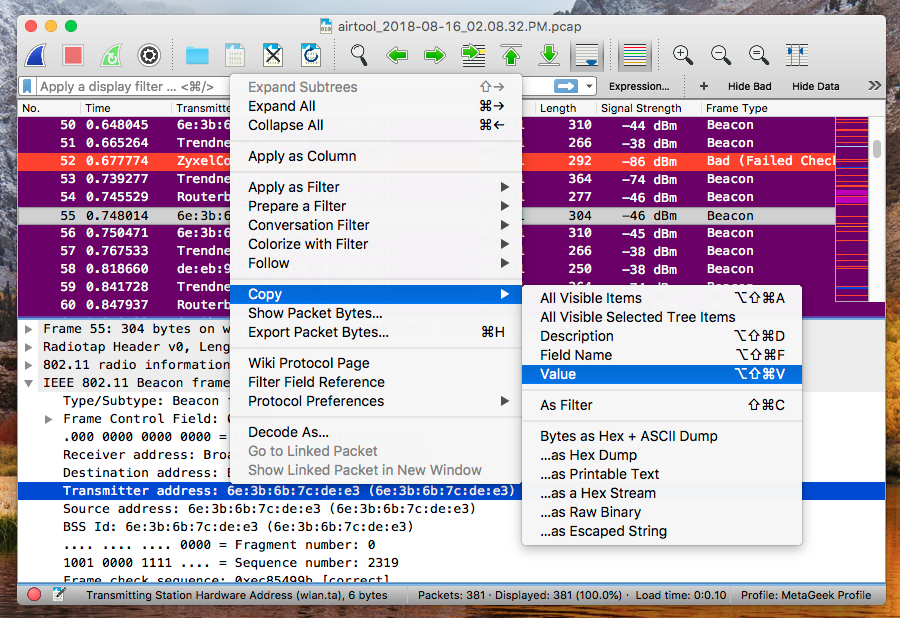
Copying MAC Addresses from Wireshark
It’s fast and easy to copy MAC addresses out of Wireshark, and you can paste them into the terminal.
- Find the transmitter, receiver, source, or destination frame in the Packet Details pane, and right-click it.
- Select Copy > Value to copy out the MAC.
- Paste into the terminal with
Command+V.